Suspended Ceilings
The Rugby 640 can also be used for suspended ceiling installations.
Mounting the laser
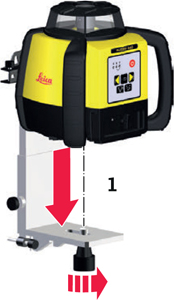
| Step | Description |
| 1 | Attach the Rugby to the wall mount bracket. |
Application
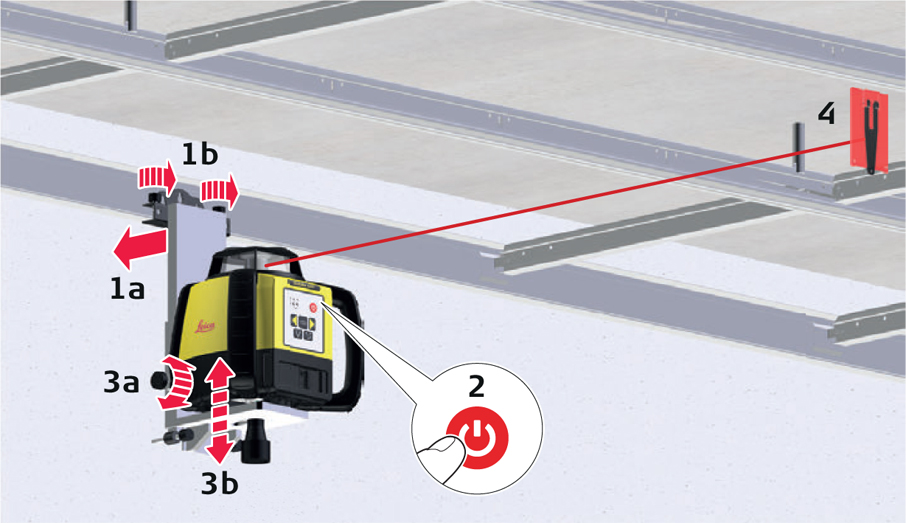
| Step | Description |
| 1 | After mounting the first strip of ceiling trim at the desired height (centre position of the ceiling target) below, attach the wall mount bracket and laser to the trim. Tighten the locking knobs on the top of the bracket. |
| 2 | Press the Power button to turn on the Rugby and allow the Rugby to selflevel. |
| 3 | Adjust the Rugby so that the rotating beam is at the desired height below the ceiling grid. Loosen the adjustment knob on the side of the bracket and slide the Rugby up or down. When at the desired height, retighten the adjustment knob. |
| 4 | Install the ceiling grid using the ceiling grid target and laser beam as your reference. |
Setup
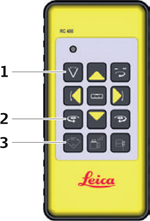
When installing suspended ceilings use the remote control to change to scanning mode for increased visibility (1). The scanning beam can be rotated using the clockwise and counter clockwise buttons on the remote (2). The scanning beam can be moved quickly in 90° increments using the Scan 90° button (3).