Layout Postitions, Squaring and more
In the laying down position the Rugby 640 can be used for laying out wall positions, squaring, transferring points and more.
Layout
The Rugby 640 projects two laser beams at a 90° angle to each other.
| Step | Description |
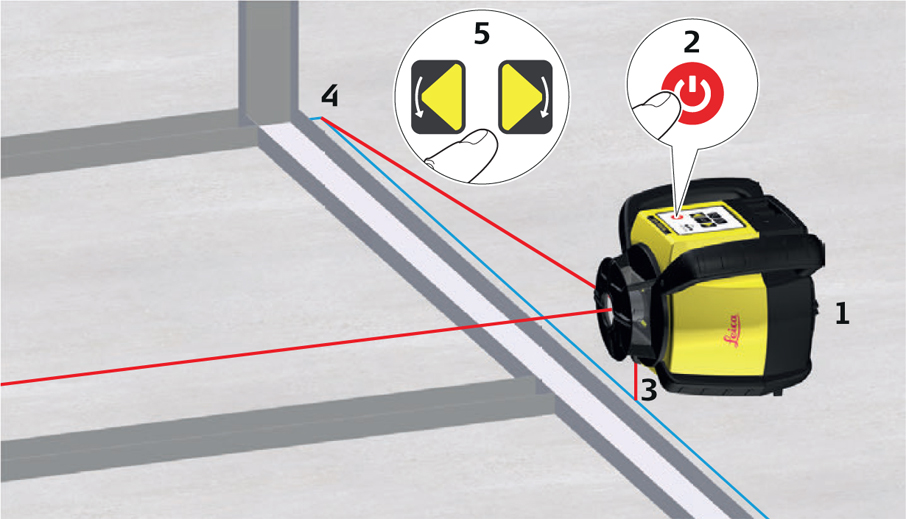
| 1 | Place the Rugby in the laydown position. |
| 2 | Press the power button to turn on the Rugby. The Rugby will always turn on in Automatic Mode. Allow the Rugby to selflevel. |
| 3 | In the laying down position the Rugby will move the beam to downwards for alignment over your reference. |
| 4 | Start the head rotation or scanning motion to roughly align the beam to a second control point. |
| 5 | Using the buttons on the laser or the remote control, fine adjust the beam until striking the second control point. |
| 6 | Once aligned the split beam and rotating beams can be used to locate 90° angles for layout. The rotating beam also creates a vertical plane for transferring points from the floor to the ceiling. |
Setup
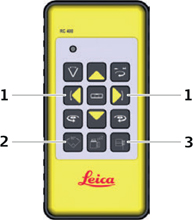
When using the Rugby in the laydown position use the left or right arrow buttons on your remote control to quickly align the vertical plane or plumb beam to the second reference point. (1). The scanning beam can be moved quickly to the left or right side of the laser using the Scan 90° button (2). To check the alignment over a point press the Beam down button (3).